
 English
Interface Design and Programming Guide on ESP32-C3 with LVGL & Squareline Studio
PROJECT OBJECTIVES:
Build a weather dashboard using SquareLine Studio software combined with the LVGL graphics library, running on TDM2517 product (using the ESP32-C3 microcontroller).

Source code reference: Download Source Code ESP32-C3-PocketView TDM2517
1. PREPARE THE PROGRAMMING ENVIRONMENT AND LIBRARY
Before you start coding, you need to install all 3 tools below on your computer.
1.1. Arduino IDE
- Function: Compile and load code for the ESP32-C3 microcontroller.
- Recommended version: 2.x or higher.
- ESP32 Board Configuration: In →, add the ESP32 Package path to the Additional Boards Manager URLs box. Then open , find and install the esp32 package of Espressif Systems (v3.x versions recommended).
FilePreferencesBoards Manager - Download link: Download Arduino IDE
1.2. SquareLine Studio
- Function: Drag-and-drop UI Designer, dedicated to the LVGL graphics library.
- Recommended version: v1.3.x or v1.4.x (good compatibility with LVGL v8).
- Download link: Download SquareLine Studio
1.3. Built-in Hardware Library
- Adafruit ST7735 and ST7789 Library: TFT LCD control driver.
- Adafruit GFX Library: The core library supports drawing basic geometries.
- LVGL: Advanced graphics processing library.
IMPORTANT NOTE: You are required to install (or downgrade) LVGL to version v8.3.x (e.g., 8.3.11). Never use v9.x because the command structure has changed completely and will cause compilation errors.
2. INTERFACE DESIGN USING SQUARELINE STUDIO
2.1. Project Initiation
- Open SquareLine Studio, click Open.
- Select IMPORT PROJECT, point to the UI project file you just downloaded (.spj extension).
- In the right column, select OPEN SELECTED PROJECT to enter the editing space.
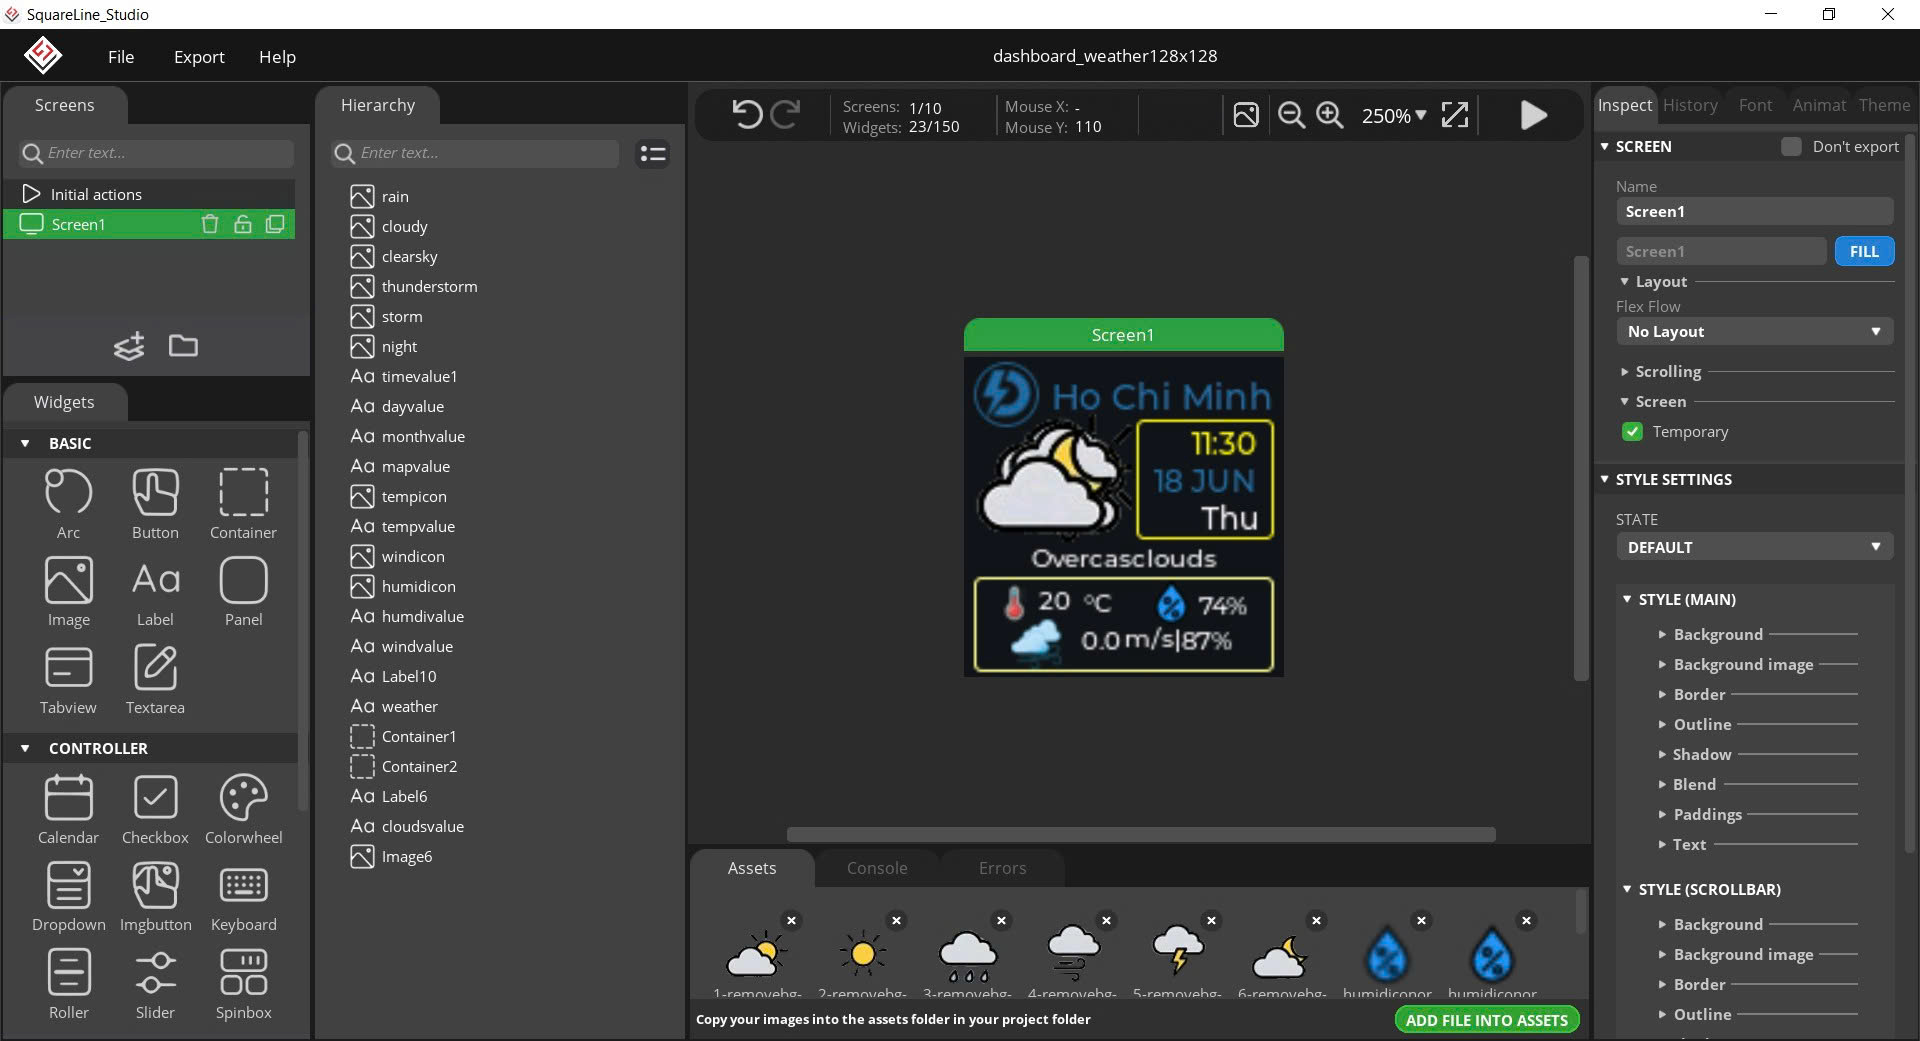
Here you can re-customize the design to your liking.
2.2. Exporting Interface Files from SquareLine
- Go to the File menu → Project Settings.
- In the code derivation box, point directly to the file folder of the Arduino project, and then click Apply Changes.
.ino - On the main menu bar, select Export → Export UI Files.
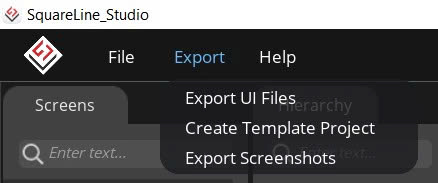
3. CONFIGURING THE LVGL LIBRARY
LVGL is a cross-platform library so you need manual configuration to activate the system and fonts on the Arduino IDE.
3.1. Activate the configuration file lv_conf.h
Library folders are usually located at: C:\Users\<TÊN_MÁY_TÍNH>\Documents\Arduino\libraries\
- Go to folder:
...\Arduino\libraries\lvgl\ - Find the file, right-click and select Copy.
lv_conf_template.h - Turn to the folder (which is parallel to the lvgl folder) and Paste the file you just copied into it.
...\Arduino\libraries\ - Rename the pasted file to .
lv_conf.h - Open the file with Notepad, go to line 15 and edit it as follows:
lv_conf.h
// Gốc:
#if 0 /* Set this to "1" to enable content */

// Sửa lại thành:
#if 1 /* Set this to "1" to enable content */- Press Ctrl + S to save it.
3.2. Activate Fonts Used in Design
Still in the open file, enable the small font size as follows:lv_conf.h
- Press Ctrl + F, find the keyword, and 4.
LV_FONT_MONTSERRAT_10LV_FONT_MONTSERRAT_1 - Correct the value from 0 to 1 to activate:
// Gốc:
#define LV_FONT_MONTSERRAT_10 0
#define LV_FONT_MONTSERRAT_14 0

// Sửa lại thành:
#define LV_FONT_MONTSERRAT_10 1
#define LV_FONT_MONTSERRAT_14 1
Press Ctrl + S to save the file, and then close Notepad.
4. SOURCE CODE EXPORT AND PATH ERROR HANDLING
NOTE: Only follow this step if you have already re-exported the graphics library, if using the sample code we provide, skip this step, as the template folder structure is already set up.
4.1. Fixing Directory Structure Errors (Compilation Errors)
By default, the Arduino IDE requires all files to be located at the same folder level. Do the following so that the compiler does not report a missing file error:
- File Included: If SquareLine creates its own subfolders (e.g. folders), copy the entire file and paste it directly into the root folder that contains the .
screens.c.h.ino - Edit a library link: Open the files with Notepad and edit the path according to the code below:
// 1. Trong file ui.h, sửa liên kết lõi LVGL:
#include "lvgl/lvgl.h"   // Xóa dòng này
#include <lvgl.h>        // Thay bằng dòng hệ thống này

// 2. Trong file ui_Screen1.c, sửa liên kết lùi cấp:
#include "../ui.h"       // Xóa dòng này
#include "ui.h"          // Thay bằng dòng ngang cấp này
5. CONFIGURE THE WEATHER API FROM OPENWEATHERMAP
To obtain actual temperature and humidity data, the project uses the service of OpenWeatherMap.
- Account Registration: Access openweathermap.org and create an account for free.
- Get API Key: In the My API Keys section, you’ll see a string of characters (Keys). Copy this string.

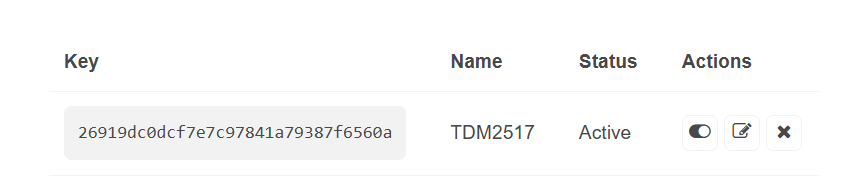
Paste the copied API Key into the correct place in the code:
const String apiKey = "THAY_API_CUA_BAN_VAO_DAY";Finally, edit the WiFi SSID and password declaration to your network information:
const char* ssid = "THAY_TEN_WIFI_CUA_BAN_VAO_DAY";
const char* password = "THAY_MAT_KHAU_WIFI_VAO_DAY";